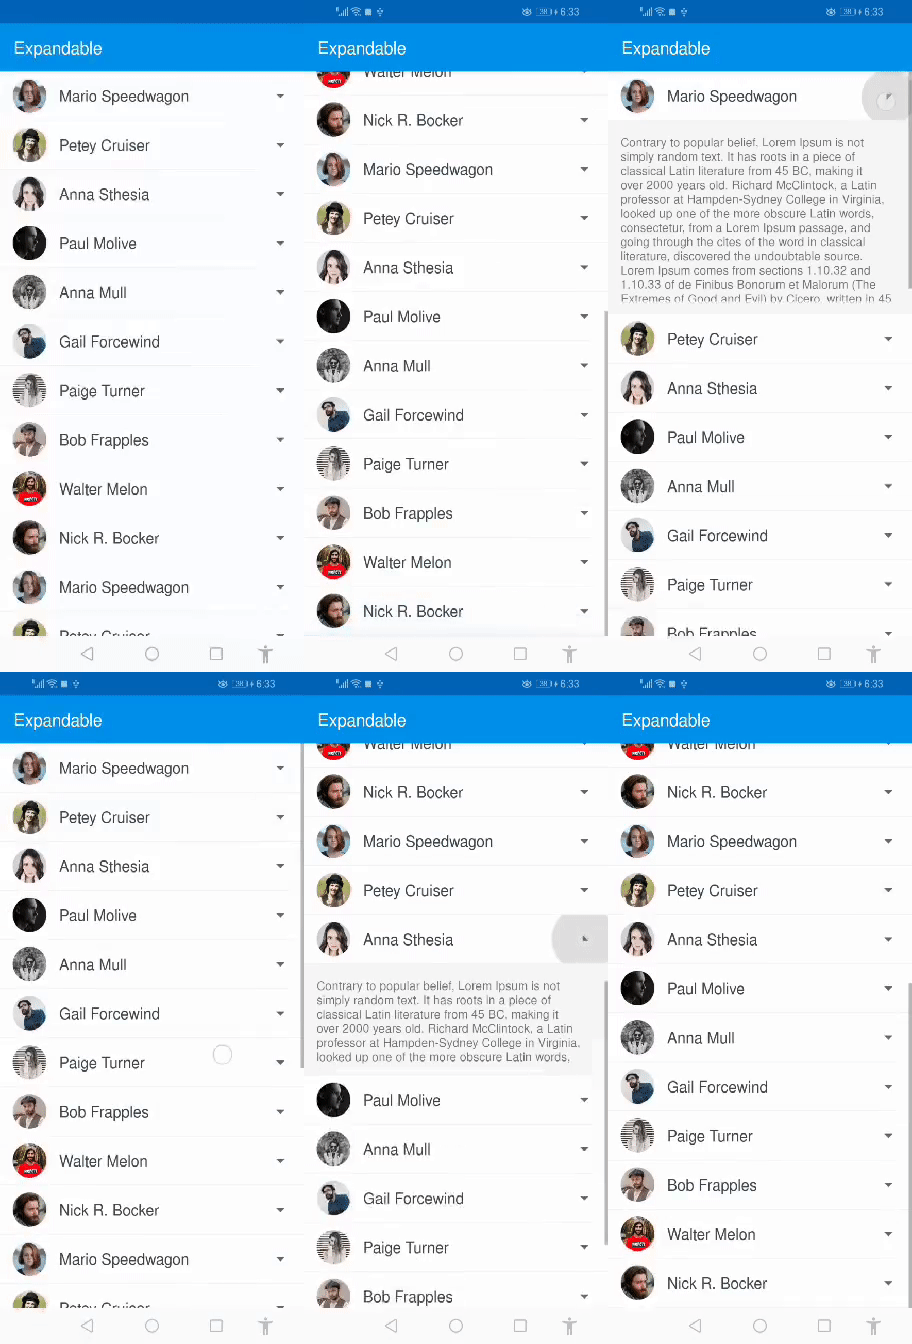
قبلا مقالهای در مورد انیمیشنهای زیبا در RecyclerView نوشتهام، که همه چیز در مورد انیمیشنهای ورودی آیتمها بود. اکنون در این آموزش میخواهیم یاد بگیریم که چگونه آیتمهای RecyclerView را با انیمیشن Expand کنیم. جالب به نظر میاد نه؟ بیایید نگاهی به آنچه که در موردش صحبت کردیم داشته باشیم.

با ضربه زدن بر روی پیکان جلوی هر آیتم، یک layout اضافی در زیر آن قابل مشاهده خواهد شد. میتوانید اطلاعات اضافی را در آنجا قرار دهید. همچنین میتوانید انیمیشن یکنواخت از expand و collapse کردن layout و چرخش پیکان کوچک را هربار ببینید.
بیایید شروع کنیم!
اگر نمیدانید چگونه باRecyclerView شروع به کار کنید، من از شما میخواهم تا به این وبسایت رفته و آن را بررسی کنید تا در مورد آنچه که در ادامه میبینید آگاهتر باشید.
قدم اول
بیایید یک پروژهی جدید بسازیم و وابستگیهای زیر را به آن در فایل build.gradle اضافه کنیم.
dependencies{

    implementation 'com.balysv:material-ripple:1.0.2' // for ripple effect
    implementation 'com.android.support:recyclerview-v7:28.0.0' //recyclerView
    implementation 'com.squareup.picasso:picasso:2.71828' //for loading images
    implementation 'de.hdodenhof:circleimageview:3.0.0' //circularImageView

}
من معمولا با databinding کار میکنم، بنابراین با اضافه کردن تکه کد کوچکی زیر android{} و در فایل build.gradle آن را فعال میکنم.
dataBinding{
    enabled true
}
نکته: اگر چیزی در مورد databinding نمیدانید اینجا را بررسی کنید.
قدم دوم
اکنون زمان آن رسیده است که یک کلاس مدل درست کنیم. یک کلاس با نام Person ایجاد کنید. کدهای زیر را در آن کپی کنید.
public class Person {

    String name;
    String description;
    boolean isExpanded;
    int image;

    public int getImage() {
        return image;
    }

    public void setImage(int image) {
        this.image = image;
    }

    public boolean isExpanded() {
        return isExpanded;
    }

    public void setExpanded(boolean expanded) {
        isExpanded = expanded;
    }

    public String getName() {
        return name;
    }

    public void setName(String name) {
        this.name = name;
    }

    public String getDescription() {
        return description;
    }

    public void setDescription(String description) {
        this.description = description;
    }
}
قدم سوم
بیایید یک آداپتور درست کنیم تا RecyclerView کار کند. یک کلاس به اسم ExpandableRecyclerViewAdapter.java میسازیم، و کدهای زیر را در آن کپی میکنیم.
public class ExpendableRecyclerViewAdapter extends RecyclerView.Adapter<ExpendableRecyclerViewAdapter.ViewHolder> {

    Context context;
    List<Person> personList;

    public ExpendableRecyclerViewAdapter(Context context, List<Person> list) {

        this.context = context;
        this.personList = list;
    }

    @NonNull
    @Override
    public ViewHolder onCreateViewHolder(@NonNull ViewGroup viewGroup, int i) {

        View view = LayoutInflater.from(context).inflate(R.layout.item_expand, null);
        ItemExpandBinding bi = DataBindingUtil.bind(view);
        return new ViewHolder(bi);

    }

    @Override
    public void onBindViewHolder(@NonNull final ViewHolder holder, final int i) {

        holder.bi.name.setText(personList.get(i).getName());

        Picasso.get().load(personList.get(i).getImage()).into(holder.bi.image);

        holder.bi.viewMoreBtn.setOnClickListener(new View.OnClickListener() {
            @Override
            public void onClick(View v) {

            }
        });

    }

    @Override
    public int getItemCount() {
        return personList.size();
    }

    class ViewHolder extends RecyclerView.ViewHolder {

        ItemExpandBinding bi;

        public ViewHolder(@NonNull ItemExpandBinding itemView) {
            super(itemView.getRoot());

            bi = itemView;

        }
    }
}
برای نمایش هر آیتم، یک آیتم RecyclerVIew شبیه به شکل زیر ساختهام.

برای ساخت چنین آیتمی کدهای زیر را در فایل xml خود کپی کنید:
<?xml version="1.0" encoding="utf-8"?>
<layout>
    <LinearLayout xmlns:android="http://schemas.android.com/apk/res/android"
        android:layout_width="match_parent"
        android:layout_height="wrap_content"
        android:orientation="vertical"

        >

        <LinearLayout
            android:background="#fff"
            android:id="@+id/parent"
            android:focusable="true"
            android:clickable="true"
            android:minHeight="?attr/actionBarSize"
            android:gravity="center_vertical"
            android:orientation="horizontal"
            android:layout_width="match_parent"
            android:layout_height="?attr/actionBarSize">

            <View
                android:layout_width="15dp"
                android:layout_height="wrap_content"/>


            <de.hdodenhof.circleimageview.CircleImageView
                android:id="@+id/image"
                android:src="@drawable/photo_male_1"
                android:background="@android:color/transparent"
                android:layout_width="40dp"
                android:layout_height="40dp" />

            <View
                android:layout_width="15dp"
                android:layout_height="wrap_content"/>

            <TextView
                android:id="@+id/name"
                android:layout_width="0dp"
                android:layout_height="wrap_content"
                android:layout_weight="1"
                android:text="Mutufa Ansari"
                android:textColor="#37474F"
                android:textAppearance="@style/TextAppearance.AppCompat.Medium"/>

            <View
                android:layout_width="15dp"
                android:layout_height="wrap_content"/>

            <ImageButton
                android:id="@+id/viewMoreBtn"
                android:tint="#666666"
                android:src="@drawable/ic_arrow"
                android:background="?attr/selectableItemBackgroundBorderless"
                android:layout_width="?attr/actionBarSize"
                android:layout_height="?attr/actionBarSize" />

        </LinearLayout>

        <View
            android:layout_width="match_parent"
            android:layout_height="1dp"
            android:background="#f2f2f2"/>

        <LinearLayout
            android:layout_below="@id/parent"
            android:visibility="gone"
            android:background="#f7f7f7"
            android:orientation="vertical"
            android:id="@+id/layoutExpand"
            android:layout_width="match_parent"
            android:layout_height="wrap_content">


            <TextView
                android:layout_width="match_parent"
                android:layout_height="wrap_content"
                android:layout_margin="15dp"
                android:text="@string/lorem"/>


        </LinearLayout>


    </LinearLayout>
</layout>
حال، قبل از رفتن به قسمت انیمیشن، اجازه دهید کار خود را با RecyclerView تمام کنیم.
Activity_main.xml من شبیه به زیر است:
<?xml version="1.0" encoding="utf-8"?>

<layout>
    <LinearLayout
        android:orientation="vertical"
        xmlns:android="http://schemas.android.com/apk/res/android"
        xmlns:tools="http://schemas.android.com/tools"
        xmlns:app="http://schemas.android.com/apk/res-auto"
        android:layout_width="match_parent"
        android:layout_height="match_parent"
        tools:context=".ui.MainActivity"
        >

        <android.support.design.widget.AppBarLayout
            android:layout_width="match_parent"
            android:layout_height="wrap_content">


            <android.support.v7.widget.Toolbar
                android:theme="@style/ThemeOverlay.AppCompat.Dark.ActionBar"
                android:id="@+id/toolbar"
                android:background="?attr/colorPrimary"
                android:layout_width="match_parent"
                android:layout_height="?attr/actionBarSize">

            </android.support.v7.widget.Toolbar>


        </android.support.design.widget.AppBarLayout>


        <android.support.v7.widget.RecyclerView
            android:scrollbars="vertical"
            android:id="@+id/list"
            android:layout_width="match_parent"
            android:layout_height="match_parent">

        </android.support.v7.widget.RecyclerView>

    </LinearLayout>
</layout>
در MainActivity.java میخواهیم RecyclerView و کارکرد آن را پیادهسازی کنیم. برای انجام این کار نیاز به دادههای ساختگی داریم. من تعدادی آرایه در فایل array.xml از طریق فولدر value ساختهام. شما هم میتوانید دادههای ساختگی یا واقعی خود را داشته باشید. کدهای زیر را کپی کنید:
public class MainActivity extends AppCompatActivity {

    ActivityMainBinding bi;
    ExpendableRecyclerViewAdapter adapter;
    List<Person> personList;

    @Override
    protected void onCreate(Bundle savedInstanceState) {
        super.onCreate(savedInstanceState);
        bi = DataBindingUtil.setContentView(this, R.layout.activity_main);


        init();


    }

    private void init() {
        setSupportActionBar(bi.toolbar);
        getSupportActionBar().setTitle("Expandable");
        personList = new ArrayList<>();
        personList = getPersonsData();
        personList.addAll(Data.getPersonsData(this));
        adapter = new ExpendableRecyclerViewAdapter(this, personList);
        bi.list.setLayoutManager(new LinearLayoutManager(this));
        bi.list.setHasFixedSize(true);
        bi.list.setAdapter(adapter);


    }

    public List<Person> getPersonsData() {
        List<Person> people = new ArrayList<>();
        String[] persons = getResources().getStringArray(R.array.people);
        TypedArray images = getResources().obtainTypedArray(R.array.images);

        for (int i = 0; i < persons.length; i++) {
            Person person = new Person();
            person.setName(persons[i]);
            person.setImage(images.getResourceId(i, -1));
            people.add(person);
        }

        return people;

    }
}
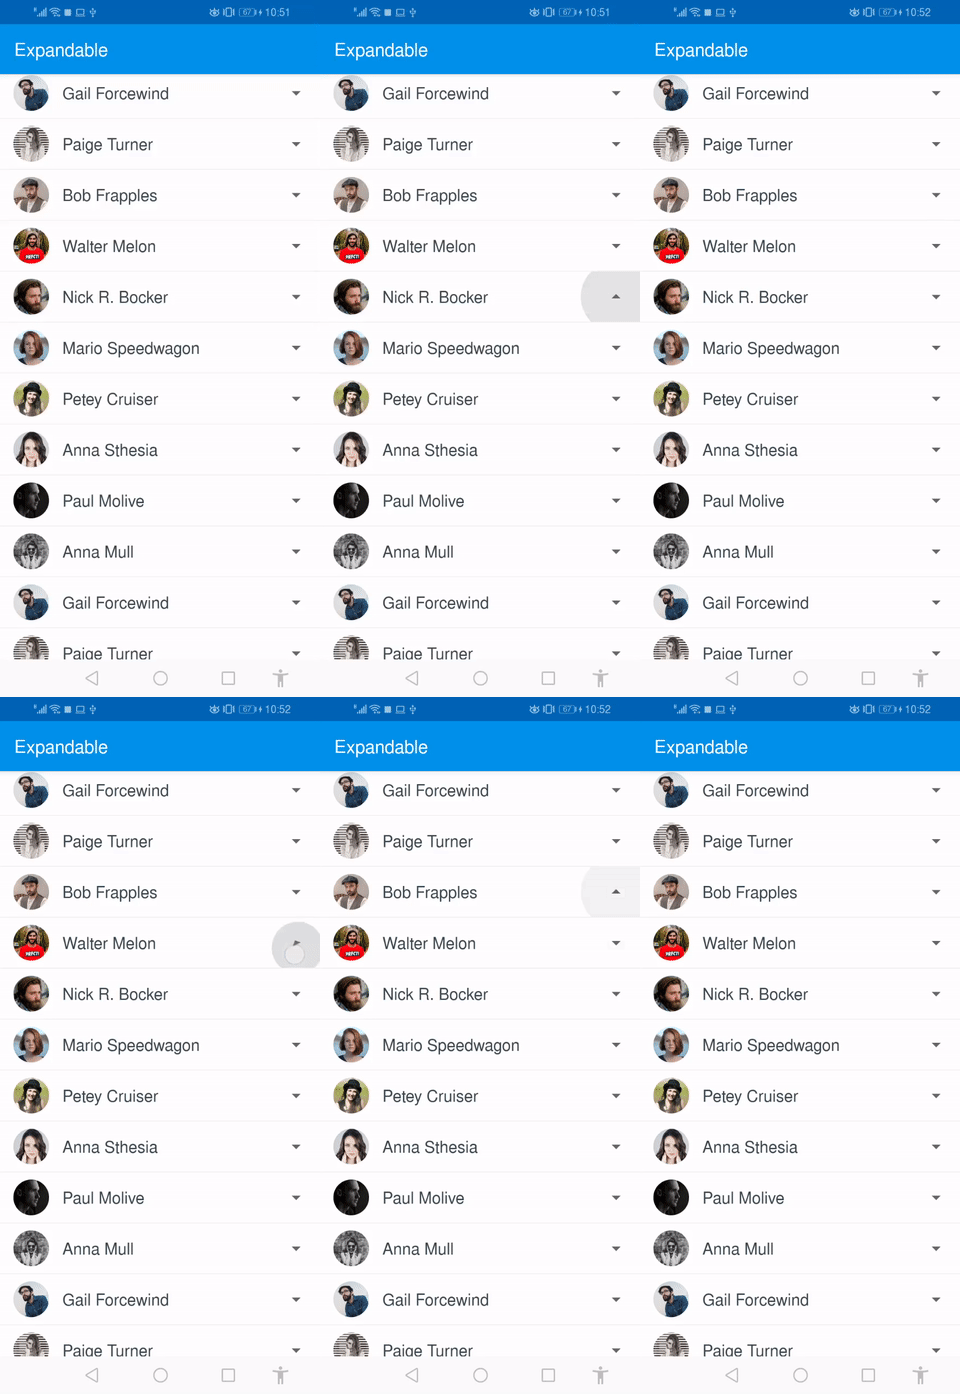
امیدوارم شما هم نتیجهی زیر را بگیرید.

اکنون پیادهسازی اولیه به پایان رسیده است. بنابراین وقت آن رسیده است که تعدادی انیمیشن اضافه کنیم. پس بیایید آن را انجام دهیم.
قدم چهارم
من یک پکیج به اسم animations میسازم، و در آنجا کلاسی به اسم Animations.java میسازم.
بیایید قدم به قدم با هم به جلو بریم. من میخواهم با ضربه زدن به پیکان انیمیشن آن اجرا شود. برای این کار، نیاز است تا این قطعه کد زیر را در کلاس Animations.java کپی کنید.
public static boolean toggleArrow(View view, boolean isExpanded) {

        if (isExpanded) {
            view.animate().setDuration(200).rotation(180);
            return true;
        } else {
            view.animate().setDuration(200).rotation(0);
            return false;
        }
    }
بیایید آداپتور را ویرایش کنیم:
 @Override
    public void onBindViewHolder(@NonNull final ViewHolder holder, final int i) {

        holder.bi.name.setText(personList.get(i).getName());

        Picasso.get().load(personList.get(i).getImage()).into(holder.bi.image);

        holder.bi.viewMoreBtn.setOnClickListener(new View.OnClickListener() {
            @Override
            public void onClick(View v) {

                boolean show = toggleLayout(!personList.get(i).isExpanded(), v, holder.bi.layoutExpand);
                personList.get(i).setExpanded(show);
            }
        });

    }

    private boolean toggleLayout(boolean isExpanded, View v, LinearLayout layoutExpand) {
        Animations.toggleArrow(v, isExpanded);
        return isExpanded;

    }
با اجرای برنامه و ضربه زدن بر روی پیکان باید بچرخد.

قدم پنجم
بیایید عملکردی را پیادهسازی کنیم که با ضربه زدن بر روی پیکان کمک کند تا layout اضافی برای ما باز شود.
برای این کار باید چند خط کد به کلاس Animation.java اضافه کنید.
public static void expand(View view) {
        Animation animation = expandAction(view);
        view.startAnimation(animation);
    }

    private static Animation expandAction(final View view) {

        view.measure(ViewGroup.LayoutParams.MATCH_PARENT, ViewGroup.LayoutParams.WRAP_CONTENT);
        final int actualheight = view.getMeasuredHeight();

        view.getLayoutParams().height = 0;
        view.setVisibility(View.VISIBLE);

        Animation animation = new Animation() {
            @Override
            protected void applyTransformation(float interpolatedTime, Transformation t) {

                view.getLayoutParams().height = interpolatedTime == 1
                        ? ViewGroup.LayoutParams.WRAP_CONTENT
                        : (int) (actualheight * interpolatedTime);
                view.requestLayout();
            }
        };


        animation.setDuration((long) (actualheight / view.getContext().getResources().getDisplayMetrics().density));

        view.startAnimation(animation);

        return animation;


    }

    public static void collapse(final View view) {

        final int actualHeight = view.getMeasuredHeight();

        Animation animation = new Animation() {
            @Override
            protected void applyTransformation(float interpolatedTime, Transformation t) {

                if (interpolatedTime == 1) {
                    view.setVisibility(View.GONE);
                } else {
                    view.getLayoutParams().height = actualHeight - (int) (actualHeight * interpolatedTime);
                    view.requestLayout();

                }
            }
        };

        animation.setDuration((long) (actualHeight/ view.getContext().getResources().getDisplayMetrics().density));
        view.startAnimation(animation);
    }
دوباره باید آداپتور خود را ویرایش کنید. این بار باید چند خط کد به متد toggleLayout() اضافه کنید.
private boolean toggleLayout(boolean isExpanded, View v, LinearLayout layoutExpand) {
    Animations.toggleArrow(v, isExpanded);
    if (isExpanded) {
        Animations.expand(layoutExpand);
    } else {
        Animations.collapse(layoutExpand);
    }
    return isExpanded;

}
حال بیایید برنامه را اجرا کنیم و ببینیم چه کار انجام دادهایم.
برای ارجاع
toggleArrow(): این متد به ما کمک میکند تا پیکان را با صدا زدن متد animate() در کلاس view بچرخانیم و مدت زمان آن را مطابق نیاز تنظیم کنیم.
expandAction(): در این متد ارتفاع layout را اندازهگیری میکنیم، که طول انیمیشن و Expand کردن آن را براساس این اندازه انجام میدهیم.
Collaps(): عملکرد این متد نیز همانند قبلی است، اما این بار قابلیت دید layout را از VISIBLE به GONE تغییر میدهیم.


دیدگاه و پرسش
در حال دریافت نظرات از سرور، لطفا منتظر بمانید
در حال دریافت نظرات از سرور، لطفا منتظر بمانید